Using Arkayne to bring focused traffic to your site

I discovered a new, free service that you may have already noticed on my site, but didn’t even know where it was coming from. I’m talking about a new form of link building that actually makes sense. It’s called Arkayne and the two best things about it are: it’s free and it integrates with WordPress. Getting quality backlinks has never been easier!

I found them during my search for a plugin that would display related content on my blog posts to help link my site together because we all know how hard it is to keep our visitors on our site and if they don’t actually search for something, they may never see it! All I was looking for was a feature that allows me to write a blog post and have the plugin run around all my previous posts and display some links with related tags and/or keywords.

I can’t tell you how awesome this service is, so you’ll have to take my word for it.

[simple_video]

If you don’t have a few minutes to spare to finish the video, this is basically what it does. You have an account profile on their site that you use to promote your site plus your social networking account which include Facebook, LinkedIn and Twitter. You then add some basic information about your site. Over on WordPress, you install the free plugin, insert your custom API code and let the magic begin!

In time, Arkayne will read through your entire site and essentially index your content on their site via links in your account. This makes you searchable to all Arkayne users. What will happen is people on the site will find your blog and if they deem it interesting and/or useful, they will click on Recommend and you basically have a “follower”. You, in turn, will also recommend blogs you find interesting and useful. This is a very useful tool for link building, which will get those coveted backlinks your site needs.

As time moves on, all of your posts will start to generate related links to other sites in the network and those sites who have recommended you will have your link show up on their posts. So just like other ranking sites, the more people that find your site useful, the more sites your links show up on.

Beyond that, you still get the feature I was originally looking for and that is this plugin will scour your site looking for related content that you’ve posted and place those links as well. You can even set how many links of each type are shown, from 1-5. You can see below that I currently have it set to show 3 of my links and 4 outside links.

The site appears to be running with a small amount of users so far (or least in the searches I did), but I have a lot of faith in this site due to it’s nature. Of course, only time will tell.

Join Arkayne Today!!

WordPress Plugins

I want to talk a little about WordPress plugins. These little “tools” can take the already powerful WordPress and completely change everything about it! You can add functions that you never thought were possible as well as adding (or removing) security features, editing current functions and most importantly, just make life easier in the blogosphere!

Near the bottom of this post, I made a list of my favorite plugins and reasons why you should add them to your WordPress install. But, before I show you the list, I want to make sure you have a handle on this subject. I want to give you a few notes to remember before you start adding everything that comes your way.

First off, plugins are made by anyone. You can find plugins created by actual software companies and some you even have to pay for, but the majority of plugins are created by users like you and I. One day, they were on WordPress and though to themselves, “I really wish I could…” and then all of a sudden a plugin was born to allow that user to do something different.

I mention this because when dealing with software on computers, especially serverside software, you always want to be concerned with security and stability. With that said, remember these key items:

  • The official WordPress plugin respository is located here: http://wordpress.org/extend/plugins/
  • The plugin help site is located here: http://codex.wordpress.org/Plugins
  • Always check the version number of WordPress you’re using and match it to the “tested” version number of the plugin you wish to install.
  • Always keep current and consistant backups of your WordPress database in case something goes wrong.

Now, I always recommend installing plugins directly from your WordPress install. You’ll notice the Add New Plugins button after clicking on the Plugins menu item. This is a very easy process and it installs the plugin directly into the proper place and activates it afterward. It also pulls the plugin directly from the repository so you can be assured that the plugin is authentic.

You will notice that every plugin has it’s own website link. Some authors create many plugins and like to showcase them on their own website. This leads to the second way to install plugins. You can download them as a compressed file, extract them and upload them via FTP to your server if you’d like. Once the files are uploaded, you then have to log into WordPress, go to Plugins and activate it.

Paid Plugins

Not every plugin is free (although most are). Some developers out there feel that they have created a really valuable tool and wish to earn money from it. There’s nothing wrong with this as everyone should be paid for their time. My only hope is, for those who have paid for plugins, that they are getting proper support!

Paid plugins are not available from the WordPress repository. You will need to access them from the developer’s website and you will want to carefully review their terms and conditions while also checking to ensure that the payment process is secured.

My Top 5 Plugins

I use over 20 plugins and most of them are simply to make things easier managing this site, but I’ve picked out five that I think are must-haves. In time, this may grow to be a top 10 and so on!

Plugin

Description

Price

Download

Ninja Affiliate This little tool allows you to cloak your outbound links for whatever purpose you deem necessary. Click on the link to read much more about this plugin, but to put it simply: let’s say you have an affiliate program that offers you a link to promote. This link might look like: http://offers.12.offersite.com/refer=12345&id=24432. The idea is to get that link to look much nicer without having to perform a redirect. Ninja Affiliate does just this. You may have noticed some links around my site that are similar to: https://www.ledfrog.com/jump/ecm. Cloaking the link not only cleans up your page, but it also makes it appear as though you don’t have tons of offers all over your site. $97 From MaxBlogPress
All in One SEO Pack Out-of-the-box SEO for your WordPress blog. There is also a pro version of this that adds more features (costs money). View the differences and purchase it from here. FREE From WordPress
IntenseDebate Comments IntenseDebate Comments enhance and encourage conversation on your blog or website. Full comment and account data sync between IntenseDebate and WordPress ensures that you will always have your comments. Custom integration with your WordPress admin panel makes moderation a piece of cake. Comment threading, reply-by-email, user accounts and reputations, comment voting, along with Twitter and friendfeed integrations enrich your readers’ experience and make more of the internet aware of your blog and comments which drives traffic to you! To get started, please activate the plugin and adjust your IntenseDebate settings. FREE From WordPress
WordBooker This plugin allows you to cross-post your blog posts to your Facebook Wall/Fan Page Wall/Group Wall. You can Post as an Extract, A Status Update or even as a Note. FREE From WordPress
NextGen Gallery NextGEN Gallery is a full integrated Image Gallery plugin for WordPress with a Flash slideshow option. Before I start writing the plugin I study all photo and picture plugins for WordPress, I figure out that some of them are really good and well designed, but I missed a simple and easy administration back end to handle multiple photos, galleries and albums. FREE From WordPress

Searching the repository is a great way to start looking for all those extra functions your site needs. You’d be surprised what kinds of things you thought you could live without!

13 Ways to Kill Your Blog

Matt Mullenweg is the creator of WordPress and founder of Automattic. Over on his blog, he mentioned 6 ways to kill your community an added 7 more on top of that. I found these tips to be extremely useful, so I’m posting them here all together for a total of 13 ways to kill your blog.

I won’t list them as sarcastically as Matt did–rather, I’ll give them to you straight.

  1. Don’t Moderate — If you choose not to moderate your blog, you’re missing out on an important opportunity to keep you blog organized and relavent. If you’re noticing your posts getting lots of comments, but most them are not adding any real value to the topic, you’re actually doing a dis-service to your site. Clean up those comments and make sure that they stay on topic. Your readers will appreciate it too!
  2. Spam Comments — Your blog should (at the very least) be running some type of spam filter plugin. Akismet is just that and it comes with every install of WordPress so there’s no excuse not to use it! If you end up letting spam in, you’re just opening the door for MUCH, MUCH more spam to come your way. Also, if the spammer starts spamming the links of your authors, they’re not going to be too happy either.
  3. Forceful Signups — You probably experienced this one personally when wanting to comment on a blog somewhere. How many times have you really wanted to post something, but as soon as your forced to signup as a member, you simply close the page and move on? You don’t like it and neither does anyone else! Allow your visitors to post comments freely.
  4. Comment Participation — If you intend to ignore your visitors, why are you blogging in the first place? You should be thankful that people are even coming to your site. One way to do this is to respond to comments as part of the dialog. This is especially true when a user asks questions.
  5. Posting Random Junk — The Internet is filled with crap and LOTS of it! Don’t add to the trash heap by posting automated comments from people’s Twitter accounts, Facebook, MySpace, etc. Eventually it becomes too much to follow and along with making your site look cluttered, it’ll be a surefire way to send people packin’.
  6. “Design like NASCAR” — I had to quote this one because there was no other way to describe it! If your blog is covered in widgets, banners, ads, sharing buttons, etc., then you won’t have much of a blog left in short time. Some bloggers think that adding more “function” to their site(s) creates loyalty and having too little creates a lack of substance. The fact is, if you focus more on your content and less on your “experience”, you’ll notice that in time, your content will become the experience. As time moves forward, you’ll discover new things that you need to add to your site, but do it in small doses.
  7. Search Engines — Hosting comments on external systems and then injecting them into your site in an effort to make your site appear differently to search engines as it appears to your users is a shady practice and you don’t want to get caught doing it. Getting ranked in the search engines is a never-ending game, but the most important things you can do is create original content and have other important sites link to yours. Both of these requires time. Take the time to make your blog relavent and unique and the results will come naturally.
  8. Comment Pruning — While you’re advised to prune unnecessary comments and other irrelevant notes, don’t go deleting comments just because they shine a negative light over you or your site in an attempt to make it seem like you can do no wrong. This is just bad business and if people catch on, you’re going to look a lot worse.
  9. Comment Box Placement — Keep the comments below the post. Not to the side, not on top–at the bottom. The point of having such a place to leave comments is because people are supposed to read your blog and then make a statement. What sense does it make to have comments anywhere else but after the post?
  10. Subscriptions — Give your visitors a reason to come back. If they don’t want to come back, at least give them a way to still get your content via services such as RSS or email. This allows users to keep getting your content without having to come back and look for the latest stuff.
  11. Too much Clicking — K.I.S.S.: Keep It Simple, Stupid. It’s really that obvious. As a web user yourself, you already know how annoying it is when you’re on a website and you’re looking for something, but to get there you have to click about 15 times. On blogs, this is usually related to loooong posts that get separated onto multiple pages or huge comments lists. My advice: just let it ride. Leave that content on one long page if you have to. The user will be happy to know that everything they need is right there.
  12. Comment Moderation — There’s an option in WordPress to moderate comments before they’re posted to the site. Although this is a great tool for filtering spam, it’s also a great slap in the face to posters that have previously posted and been approved for their comment(s). Make sure these users can get through without the extra hurdle. They will appreciate that you know they’re not spammers.
  13. Audience Participation — Get your users excited about coming to your site. They love participating in polls, surveys, contests, etc. These features are generally used when your site starts to have regular traffic, but in most cases, it’s not too early to start. Just don’t forget rule 6!

This of course is just a smidgen of the things you should be weary of. As a rule of thumb, if you’re not sure what to do, just post content. Just post what you feel, what you want to talk about, what you’re passionate about and everything will come in due time. Your blog may not be ranked high in the search engines and it may not be considered popular, but as more and more of your words get out into the world, the more action you’ll see on your site. Don’t get discouraged and happy blogging!

Amazon.com Affiliate Program

Give your visitors full access to all of Amazon.com while making commissions from every sale you generate! Everyone knows and loves Amazon and you may have in fact purchased from them before, so it’s safe to say that it’s a trusted brand. However, unlike most affiliate programs where your visitor has to click on your ad, visit the website in question and make a specific purchase, Amazon Associates network simply passes on a tracking cookie to your visitor when they click on your Amazon link.

What this does is make any and every purchase they make with that cookie get credited to you! Commission payouts start at 4% and can go to 6% (after you successfully convert 6 sales). This may not seem like much when someone is buying a $10 cd, but I can remember on more than one occasion when a user clicked on one of my links and ended up buying something completely different (and more expensive)!

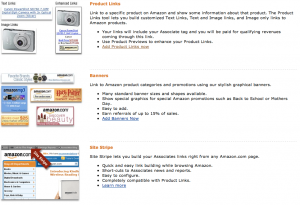
Using the program is super easy. Once you log in, you can view all of your stats including dollars earned, current commission rate, number of clicks, API access, Amazon store creation and most importantly, the link builders. Here are some of the various ways you can create links and product ads for your site:

Better yet, if you have a blog system such as WordPress, you can download plugins that allow you to plug Amazon links right into your site based on content. Think of Google AdSense, but with Amazon products! Plus, if you have multiple sites that you want to run separate reports on, you can simply create new tracking ids (up to 100) and they all lead to your account. This way, you can track the performance of each site independently to see how you can maximize your exposure.

Here’s a bit of information about aStore. You are currently allowed to create up to 100 aStores in your account and what this does is allows you to create niche stores based on your desired content. For example, if you had the domain name, computerparts.com, you could create an aStore full of nothing but computer parts and accessories that Amazon sells! Of course, this is probably tens of thousands of items, so rather than add each item one by one, you’re able to add them by category. You can also add search capabilities. When someone goes to buy something, they click through to the Amazon site and make their purchase. You’re essentially creating a landing page related to your specific content.

Within about 5 minutes, I was able to create a sample store for you to see. This is a sample, but it’s still a fully functional store. You can purchase anything you want from this aStore!

You also get a 15% commission rate and link building tools for all products listed at Endless.com–Amazon’s new online shoe store! Everything is managed under your one account!!

There’s no reason not to sign up with Amazon. It’s free and very easy to use. Join today and start promoting more products than you can get anywhere else!

Getting links to your blog

It’s no secret that the popularity of your blog is directly related to how many websites link to your content. Google and other search engines equate the amount of links to your website to the quality of it’s content. It’s interesting to note that your blog can have the most original and focused content in the world, but if nobody is linking to your site, you’re not going to rank very high in search results. And as you would imagine, the opposite is quite possible.

So how do you do it? How do you get people to link to your site especially if that person’s site is potentially a competitor of yours? The answer somewhat eludes most webmasters and every site’s situation is different. The truth is that some site owners overlook this important fact. With all this focus on search engine optimization, original content, creating e-books, posting updates to social media sites and advertising, it’s hard to pay attention to every detail.

Well you can start paying attention now because this information is probably the most important part of getting traffic to your site(s). Before I go into the details of how to get it, let’s look at the different types of traffic that’s floating around the Internet.

Targeted Traffic

Targeted traffic is usually from advertising streams. As an example, if you purchase Google AdWords, you’re essentially buying keywords that are related to the content of your site and the ads will show up on other sites that are simliar to yours. If someone on that site likes your ad, they’ll click on it and come to your site. Other forms of targeted traffic are from email campaigns that send out advertisements to people who have signed up for email alerts for specific information. Today, search engines are making attempts to return search results that are targeted to each user, but this is still only one piece of the “ranking” pie.

Type-in traffic

As the name implies, this kind of traffic is from people that simply type your domain into their web browser directly to come to your site. This traffic is the most difficult to obtain from the start unless you own a fairly generic domain name. Think about your own Internet usage. Have you ever wanted to lookup a topic such as cell phones and just typed in cellphones.com? Type in traffic for your site will come with time as people start remembering your site.

Search engine traffic

You’ll start to notice as you build your site and keep adding content to it that people will just start showing up. Search engines are always adding new content by sending out their spiders to locate information on the Internet to catalog it in their databases. Also, as you start posting content, you might end up writing about something that doesn’t have a lot of coverage on the Internet and this will dramatically increase traffic to your site.

Other traffic

There are many other places your site will start receiving traffic from. This traffic is not worth mentioning because it’s not only a small amount overall, but it’s also not the type of traffic you want. There are sites all over the Internet that make attempts to link to every site possible. Some even get more organized by sorting these links into categories. These sites are sometimes called link farms and are frowned upon by search engines. If you ever see offers on the Internet the purchase links on these sites with promises to add your site to “hundreds of targeted websites”, you want to avoid them. They can actually cause negative effects to your hard work.

Find those links

All this traffic is wrapped around the concept of getting links and now it’s time to learn the basics about how to get people to link to your site. If done right (and ethically), this process might be the most time consuming (or not). One way to do this is to let the fates decide: simply post your content and as people find it, let them link to it on their own. The second way is to go looking for the links.

The best way to do this is to just ask people to link to your site. Go around searching for sites that share similarities to your own and find out if the owner would be willing to link to your site. Usually this means he/she will want you to link back to them as well.

Link trading

This is a surefire way to get links to your site. But you need to know that webmasters will not link to your site if you don’t have original content or if your site looks like there’s not much substance to it. Also, they will not want you to link to them because bad sites can cause negative light to shine on good sites. Each webmaster might have varying rules for their link to be displayed. Link trading can be a time-consuming process, but it can prove very valuable to your site’s performance.

A good tip for your site is to create a links page close to your home page and accessible from it as well. My advice is to make a link like mine, ledfrog.com/links. This will ensure that all your web links will be clearly visible form your site and webmasters love this.

Sponsored links

Many websites are now offering link placement offers where you can pay a webmaster for a link on their site. The costs vary greatly based on the popularity of the site and where the link is located. Most websites will tell you the factual details of this placement and maybe even an estimated traffic count so you can value your dollar as much as possible. There’s no shame in buying links and in time, you won’t have to pay for them because eventually you’ll be the one charging!

Sponsored ads

The most obvious way to get traffic is to buy ads that offer your site’s link on countless other related websites across the Internet. This might be a more viable option to those of you that operate businesses online, but anyone can buy ads; if you’re willing to pay for them. Essentially you pay a small fee every time someone clicks on your ad.

Publish content

This one is more about publishing suplemental content. Your site will already have everything you’ve added to it, but every now and then you should consider creating something that people can download and pass on to their friends such as an e-book or maybe even a consolidation of a few of your posts. Be sure to place links to your site in these documents to ensure that no matter where it ends up online, people will always know where it came from. Also, give permission to other sites to use your content in lieu of posting a link to your site.

Email marketing

Be VERY careful with this one considering the amount of spam that is going around the Internet these days. I would suggest only emailing those that have signed up to your site and only email periodically. You don’t want to flood them with content that they can easily get by going to your site. Try and stay away from purchasing email lists.

This is just a basic covering of ways to get links to your site. As times change, I will undoubtedly be updating this section.

H4KZP9WWCWRQ

Starting a Blog

You’ve heard of them and you’ve undoubtedly seen them, but have you ever thought about starting your own? A lot of people in your position have probably asked themselves this question, but usually there’s doubt in their minds. They doubt whether they’d have something to talk about or if people would actually read it. Above all, how can you create a “new” blog in the vast sea of information that is the Internet?

Well, fortunately, none of that matters! What matters is if you have an interest in something or you love your hobby, create a blog for it! But, the key is to have an interest…if you’re wanting to quickly move into the realm of making money with your site, you might be heading down the wrong path. More on this later.

Before I get into the how, let’s talk about the why.

Everybody has different reasons why they start a blog. Some start them because they want to share every detail about their personal life, some love reviewing products and want to give advice to other people, some are experts in their fields and love to talk about it! The end result is always satisfying to that person because they know that as long as they can help one person or share their insight to someone, then the job is done.

Here are my reasons for starting a blog:

  • Share information
  • Show off your personal life
  • Talk about something you’re interested in
  • Help people with their problems
  • Make some extra money

I’m sure that last one really caught your eye! 🙂 You might not know it, but you sure can make some extra money with your blog. How is this possible? Well, it’s all done through advertising and search engine placement. It sounds pretty easy, but there is a lot to learn about this by checking out my other guides, but for now, lets get your first blog up and running.

You may have heard of sites like WordPress.com and Blogger.com. These sites allow you to setup a blog without any actual knowledge of website building, servers, computers, etc. They are a really great start for someone starting out, but I have to vote against using them. The reason is simple: professionalism. If you use a free blogging site, your web address will be something like: username234.wordpress.com. At first, this won’t matter, but as you build and build and your site’s traffic starts growing, this can matter a whole lot.

Advertisers for one, generally don’t respond favorably to those types of web addresses. They prefer actual domain names. The flipside, however is when you get a domain name, you incur costs. When you calculate the cost of a domain and the monthly cost of having a webhost, you may start to shy away from this idea altogether. However, I’ve put together a nice little deal for new bloggers out there where I can host your site for free! Read this for more details.

Getting Started

Step 1: Decide on a topic

Brainstorm some ideas about what your want your site to focus on. There are a few ways to go about this. You could create a general blog about all of the computer industry or you could hone in one one specific topic such as the Mac operating system. Another possibility is to cover one smaller area of the larger one like a blog about all operating systems. Each one has it’s perks and obviously will vary greatly in workloads.

Step 2: Start your blog

After you’ve decided on your idea, it’s time to get the blog going. If you’re going to use a site like WordPress.com or Blogger.com, simply go to one of those sites and signup for a free account. If you have a domain and a hosted solution, you’ll need to install some blogging software. I use WordPress on all my blogs and you can download it for free from WordPress.org. It’s the same software you’d be using on a free account at WordPress.com.

I’ve created some guides to help you with this step. Check out how to use WordPress.com or how to install WordPress on your own server.

Step 3: Configure your blog

After your blog is up and running, you may want to consider adding some design to it. The generic template(s) aren’t very pleasing to the eye. If you know anything about HTML, CSS and/or PHP, you can customize your blog to your heart’s content. However, I use a much simpler approach (it also saves time): use themes. Themes are pre-built “looks” for your blog that integrate tightly with the software. I get all my WordPress themes from Woothemes.com. Their themes are the best in my opinion and if you don’t want to pay for one, check out their free ones! You can also check out TemplateMonster for a much large collection of website themes, but be sure to only browse the category for WordPress to ensure maximum compatibility.

Check out my Guides section for more information on this.

Step 4: Start blogging

Alas! The step we came here for! Now that you’ve got everything sorted out, you can start adding your content. Here’s is where your blog begins to shine. These tips will help you when blogging:

  • Always blog ORIGINAL content
  • Try to post at least one item a day
  • Stay focused on your topic(s)
  • Always give credit where credit is due
  • Obey copyright laws
  • Ensure your posts are accurate and free of grammar mistakes (remember, “professionalism”)

Congratulations! You now have your first blog! Once you get the feel for how everything works, come back and discover the many, many ways you can promote and monetize your blog.

More information can be found under the Guides category.